Knowledge
Outdoor Fiber Installation Practices Explained for 2025
You need to tackle outdoor fiber installation with a sharp focus on extreme weather, soil corrosion, and environmental challenges. Following industry standards like FOA and OSP ensures solid reliability for a stable connection, even when battling temperature swings or moisture. Use recommended practices and the latest technology to meet rising demands for gigabit speeds. The market keeps growing, driven by smart city initiatives and 5G rollouts. Careful planning and the right installation methods help you create networks that stay reliable, scalable, and easy to maintain.
Key Takeaways
Plan your outdoor fiber installation carefully by surveying the site, choosing the right cable type, and following FOA and OSP standards to ensure reliability.
Select the best installation method—direct burial, aerial, conduit, or underwater—based on your environment and future network needs.
Use proper tools, wear safety gear, and follow strict safety and environmental protection steps to keep your team safe and your network secure.
Test every fiber connection thoroughly during and after installation to catch problems early and maintain high performance.
Maintain and monitor your fiber network regularly to prevent damage from weather, soil, and wildlife, ensuring long-term service quality.
Outdoor Fiber Installation Overview
Fiber Optic Technology Basics
Extreme weather, soil corrosion, and dynamic stress shape every outdoor fiber installation. You need to understand how fiber optic cable works before you start any fiber optic installation. Fiber optic technology uses light signals to transmit data. The cable core guides light beams through total internal reflection. The cladding around the core keeps the light inside, so signals travel long distances with little loss. This principle allows fiber optic internet to deliver high-speed connections even in harsh outdoor environments.
When you install fiber optic cable outdoors, you must respect environmental limits. Exposing cables beyond their design specifications leads to failure. You should maintain proper cable sag in aerial installations. For example, a 2.5-foot sag for a 150-foot span helps cables handle thermal expansion and contraction. Service loops are essential for maintenance. Leave about 100 feet of extra cable per 1,000 feet, and add loops at street crossings. Segregate fiber optic cable from heavy copper cables to avoid bend radius violations and crush loads. Mark fiber optic cable clearly to prevent accidental damage. Comply with National Electrical Code requirements for cable ratings and fire safety. Prepare cable ends by sealing gel-filled cables and protecting buffer tubes to prevent water ingress and physical damage.
OSP and FOA Standards
You must follow strict installation guidelines for outdoor fiber optic installation. The Fiber Optic Association (FOA) divides fiber optic installation projects into several stages:
Construction, including underground and aerial methods
Cable installation, covering types, handling, tension, and bend radius
Splicing and termination, specifying locations and methods
Testing, including splice and cable plant testing
Operation, maintenance, and restoration
Construction standards address underground and aerial installation, safety protocols, and special cases like river or bridge crossings. Cable installation standards cover direct burial, conduit pulling, lashed and ADSS aerial cables. Splicing and termination standards guide you on where and how to splice fiber optic cable for outdoor fiber installation. Testing standards require you to check splices and installed cable plants for signal quality. Documentation standards follow ANSI/TIA/EIA-606 for managing fiber optic network installation records. FOA provides downloadable standards such as NECA/FOA-301 for detailed installation practices. You can access extensive online resources and training through the FOA website and Fiber U platform.
Outdoor vs Indoor Installations
You face different challenges when you compare outdoor fiber optic installation to indoor fiber optic installation. The materials, methods, and risks change with the environment. The table below highlights the main differences:
Aspect | Indoor Fiber Optic Installations | Outdoor Fiber Optic Installations |
|---|---|---|
Materials | PVC or LSZH jackets for controlled indoor environments | Polyethylene (PE) or PVDF UV-resistant jackets for moisture, temperature, and UV protection |
Installation Methods | Conduits or cable trays, fire safety, bending radius requirements | Burial or aerial methods, cable tension, sag, and grounding requirements |
Challenges | Fire safety codes, cable bending, organization | Moisture, rodents, physical impacts, extreme weather, armor or protective layers needed |
Indoor fiber optic cable uses tighter buffers and routes through conduits or trays. Outdoor fiber optic cable has rugged jackets, gel-filled or water-blocking layers, and armor to resist moisture, rodents, and temperature swings. You install indoor cables in controlled environments. Outdoor fiber optic cable installation uses burial, aerial, or direct burial methods. You need specialized equipment and planning to protect cables from environmental challenges. Outdoor fiber optic internet faces more maintenance needs due to exposure to weather and physical impacts.
Planning for Fiber Optic Installation
Extreme weather, shifting soils, and wildlife threats make outdoor fiber optic installation a complex task. You must plan every step with precision to ensure your fiber optic network installation stands up to these environmental challenges. Careful preparation helps you avoid costly mistakes and keeps your network running smoothly for years.
Site Survey and Route Planning
You start every outdoor fiber optic installation with a thorough site survey. This step helps you understand the landscape and spot any risks before work begins. Follow these steps for effective route planning:
Conduct a feasibility study to define your project’s scope and goals.
Create detailed maps and schematics of the planned cable route using GIS or CAD tools.
Choose the right fiber optic cable type for your needs—single-mode for long distances or multi-mode for shorter runs.
Plan for future upgrades by leaving space for extra cables or ducts.
Walk the proposed route to check for physical obstacles like rocks, rivers, or existing utilities.
Identify all underground and overhead infrastructure to avoid accidental damage.
Test the soil and environment to select the best installation method.
Consider accessibility, safety hazards, and environmental impact at every stage.
Tip: Use advanced surveying equipment like GNSS with RTK or LIDAR for centimeter-level accuracy. Collect field data, including pole locations and repair needs, to streamline your installation.
Permits and Compliance
You must secure the right permits before starting any fiber optic installation. Local, state, and federal rules protect both your crew and the environment. Here are key compliance steps:
Check if your area allows batch processing of permits for broadband projects. This can speed up approval, especially in states like California.
Use emergency or expedited permits for rapid restoration after disasters.
Follow all zoning, safety, and FCC guidelines during installation.
Make sure your cables have ratings for UV, moisture, and temperature extremes.
Install cables in conduits or use armored sheaths for physical protection.
Ground and bond cables at both ends to prevent electrical surges.
Seal all building entry points to keep out moisture.
Work with professionals who know the National Electrical Code and local regulations.
Note: Always keep detailed documentation of permits, inspections, and compliance checks. This protects you during audits and helps with future maintenance.
Environmental Assessment
Outdoor fiber optic installation faces unique environmental risks. You must assess these factors to choose the right materials and methods:
Extreme temperatures and humidity can damage cables. Use gel-filled or armored cables to prevent moisture and rodent attacks.
Corrosive soils or salty air require corrosion-proof materials.
Wildlife, especially rodents, can chew through cables. Armored designs help prevent this.
Flood-prone areas need cables with water-blocking technology and extra burial depth.
Regular maintenance and inspections reduce the risk of signal loss or physical damage.
Precautions: Always document environmental conditions and select cable types that match your site’s risks. This step ensures your network installation remains reliable and safe.
Choosing the right contractor is just as important as your technical plan. Look for teams with proven experience, proper certifications, and a track record of safe, high-quality installation. Require clear documentation at every stage, from pre-installation checks to final testing and restoration. This approach meets all installation requirements and keeps your fiber optic installation project on track.
Fiber Optic Cable Installation Methods
Outdoor fiber installation faces unique environmental challenges. You must plan for extreme weather, soil corrosion, dynamic stress, and wildlife. Each installation method—direct burial, aerial, conduit with microtrenching, and underwater—has its own strengths and risks. You need to select the right method based on terrain, climate, and future network needs. The Fiber Optic Association (FOA) and OSP guidelines provide a framework for making these decisions. Let’s break down each method so you can choose the best approach for your project.
Direct Burial
Direct burial is a common outdoor fiber installation method, especially in rural or open areas. You install fiber optic cable directly into the ground, usually in a trench at least 24 inches deep. This method works best in stable soils with few rocks or debris.
Advantages of Direct Burial:
Simple installation process without the need for conduit.
Lower initial costs compared to conduit systems.
Fast deployment in open, accessible areas.
Disadvantages:
Limited capacity for future expansion.
Less mechanical protection than conduit systems.
Higher risk from soil movement, frost heave, and rodent damage.
Tip: Always use armored fiber optic cable for direct burial. Armored cables have corrugated steel tape or other protective layers to resist crushing, rodent attacks, and soil movement.
Survey the route and mark all underground utilities. Maintain a minimum safety distance of 2 meters from gas lines.
Excavate a trench deeper than the local frost line (add at least 30 cm for permafrost regions).
Lay a bed of clean sand or fine soil to cushion the cable.
Place the fiber optic cable in the trench. Avoid sharp bends and maintain the manufacturer’s minimum bend radius.
Add a copper conductor for cable locating.
Cover the cable with more sand, then backfill with native soil free of rocks or sharp objects.
Install warning tape above the cable to alert future excavators.
Use pedestals or handholes for splicing and slack storage. Secure all access points with locks.
Key Equipment:
Trenching machines or plows
Armored high-quality fiber optic cable
Warning tape and cable locators
Splice enclosures and pedestals
Precautions:
You must bond and ground all armored cables to protect against electrical currents and lightning. In areas with corrosive soils or high rodent activity, select cables with extra protective layers. Document soil conditions and burial depth for future maintenance.
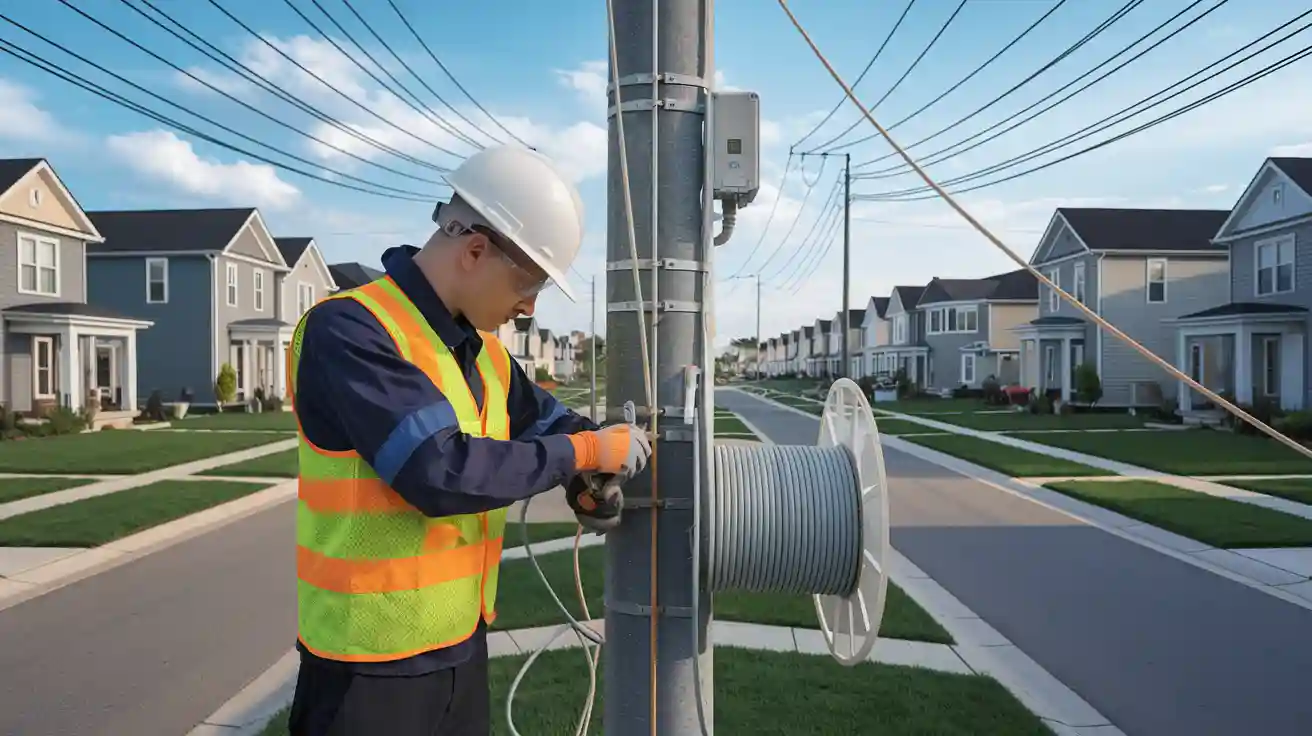
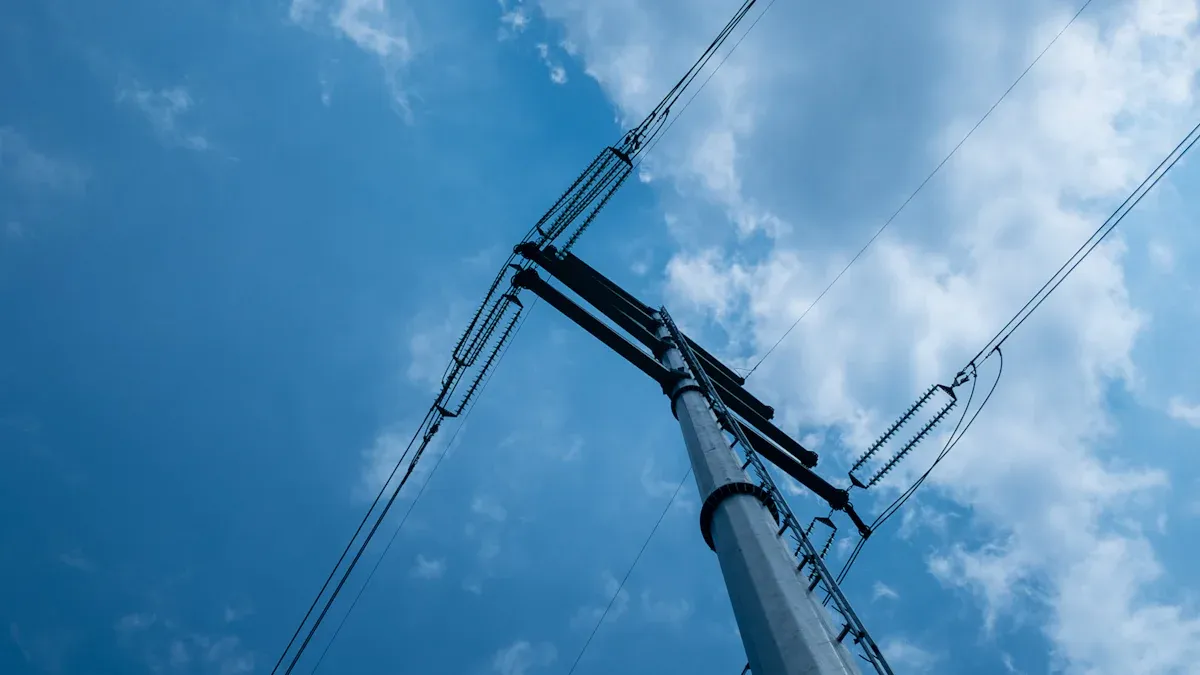
Aerial Installation
Aerial fiber optic cable installation is ideal for areas with existing utility poles or where ground disturbance is not practical. You suspend the cable above ground, which exposes it to wind, ice, and UV radiation.
When to Choose Aerial Installation:
Terrain is rocky, swampy, or prone to flooding.
Existing pole infrastructure is available.
Fast deployment is needed for disaster recovery or temporary service.
Types of Aerial Cables:
All-Dielectric Self-Supporting (ADSS) cables for high-tension spans.
Lashed cables attached to messenger wires for added support.
Installation Steps:
Inspect all poles for damage, insect nests, or sharp protrusions.
Use leather gloves for climbing and handling tools. Switch to rubber gloves near electrical circuits.
Wear fall protection gear, hard hats, and high-visibility vests.
Use ladders, hoists, and winches to lift and tension the cable.
Maintain a safe distance (3-5 meters) from power lines.
Secure the cable with proper hardware. Allow for sag (e.g., 2.5 feet for a 150-foot span) to handle wind and temperature changes.
Install service loops and vibration dampers to reduce dynamic stress.
Ground and bond all metallic components.
Safety Alert:
Limit the number of workers during cable tensioning. Keep bystanders away with cones and warning signs. Never stand opposite a cable under tension.
Key Equipment:
Bucket trucks or aerial lifts
Cable rollers and tensioners
Fall protection and PPE
Grounding clamps and warning signage
Environmental Considerations:
Aerial cables face wind, ice, and UV exposure. Use UV-resistant jackets and vibration dampers. In hurricane or high-wind zones, install distributed dampers and strain-relief hardware. Monitor cable tension and sag regularly, especially after storms.
Conduit and Microtrenching
Conduit systems protect fiber optic cable from soil movement, rodents, and future excavation. You pull or blow the cable through plastic or steel ducts buried underground. Microtrenching is a newer technique that uses narrow, shallow cuts in pavement to install conduits quickly, especially in urban areas.
Conduit Installation:
Suitable for urban, industrial, or high-traffic areas.
Allows for future cable upgrades or replacements.
Provides strong mechanical protection.
Microtrenching:
Cuts a trench as narrow as 1-2 inches wide and 8-12 inches deep.
Reduces costs for restoration and traffic control.
Installation Method | Cost Characteristics | Durability Characteristics |
|---|---|---|
Microtrenching | Cost-effective for short, accessible runs. Lower initial costs. | Shallow depth raises durability concerns. Vulnerable to frost heave, thermal expansion, and pavement work. |
Directional Drilling | Higher initial costs, complex setup. | Greater durability, minimal surface disruption, suitable for obstacles and longer runs. |
Traditional Trenching | Slower, more costly due to excavation and restoration. | Durable but causes significant surface disruption and longer restoration times. |
Installation Steps:
Map all underground utilities and mark the route.
Excavate or microtrench to the required depth (deeper for conduits, shallower for microtrenching).
Lay conduit with smooth bends and secure joints.
Pull or blow fiber optic cable through the conduit using lubricants to reduce friction.
Seal all entry points to prevent water ingress.
Restore the surface with proper materials (cold patch for microtrenching).
Document all conduit runs and access points.
Note:
Microtrenching offers speed and cost savings but may not withstand harsh climates or heavy traffic. Use improved backfilling and reinstatement techniques to enhance durability. In cold regions, monitor for conduit movement and frost heave.
Key Equipment:
Trenchers and microtrenching saws
Conduit and microducts
Cable blowing machines and lubricants
Surface restoration tools
Material Selection:
Choose UV-resistant, corrosion-proof conduit materials. For flood-prone or salty environments, use extra-sealed ducts and water-blocking cables. Always plan for future expansion by installing extra ducts.
Underwater and Special Cases
Underwater fiber optic cable installation connects islands, crosses rivers, or spans lakes. This method requires specialized planning and equipment due to water pressure, currents, and marine life.
Key Considerations:
Depth and distance determine cable robustness and signal loss.
Environmental factors like temperature, currents, and marine life require armoring and anchoring.
Cost and maintenance drive cable selection and installation planning.
Installation Steps:
Survey the waterway and seabed. Identify hazards like rocks, shipwrecks, or strong currents.
Select armored, waterproof fiber optic cable with pressure-resistant coatings and gel-filled tubes.
Use cable-laying vessels or remotely operated vehicles (ROVs) for precise placement.
Anchor the cable at regular intervals to prevent movement.
Bury the cable in the seabed where possible to protect from anchors and fishing gear.
Seal all joints and splices with waterproof enclosures.
Monitor cable health with distributed fiber optic sensors.
Precautions:
Proper sealing and waterproofing are essential. Use protective conduits and specialized armoring for harsh underwater environments. Plan for regular inspections and maintenance to detect damage from currents or marine activity.
Key Equipment:
Cable-laying ships or ROVs
Armored, waterproof fiber optic cable
Anchors and burial plows
Waterproof splice enclosures
Environmental Adaptation:
In saltwater or high-pressure zones, select cables with enhanced corrosion resistance. For rivers with strong currents, increase burial depth and use heavier armoring. Monitor for environmental changes that could expose or damage the cable.
Disaster Scenario Example:
After a hurricane, use drones to scan for aerial cable breaks. Activate pre-installed quick-connect nodes to restore service rapidly. Use loss compensation algorithms to adjust for increased attenuation due to wind and debris.
Smart Monitoring for 2025:
Install distributed fiber optic sensors (DAS) along your network. Set vibration and strain thresholds to trigger alerts before failures occur. Integrate sensor data with weather stations for predictive maintenance and insurance documentation.
Choosing the Right Method:
Use direct burial for stable, open terrain with low risk of future excavation.
Choose aerial installation for rocky, wet, or flood-prone areas with pole access.
Select conduit or microtrenching for urban environments or where future upgrades are likely.
Deploy underwater installation for crossing bodies of water or connecting remote sites.
Always match your installation methodology to the site’s environmental challenges, future needs, and regulatory requirements. Document every step, train your crew in safety, and use high-quality fiber optic cable for long-term reliability.
How to Install Fiber Optic Cable Safely
Outdoor fiber optic cable installation demands a higher level of preparation and caution than indoor work. You face extreme weather, soil corrosion, shifting ground, and wildlife threats. These environmental challenges require you to use the right tools, follow strict safety protocols, and adapt your installation methodology to the terrain. In this section, you will learn how to select necessary tools and equipment, perform reliable splicing and termination, test the fiber optic connection, and protect both your team and the environment.
Tools and Equipment
You cannot achieve a reliable outdoor fiber optic cable installation without the proper tools. Each step, from cable preparation to final testing, requires specialized equipment designed for rugged field conditions.
Essential Tools for Outdoor Fiber Optic Cable Installation:
Fiber Optic Stripper
Removes the outer coating of the fiber optic cable without damaging the core. This tool is critical for safe and precise fiber preparation, especially in cold or wet conditions.Buffer Tube Slitter
Opens buffer tubes to access individual fibers. Use this tool to avoid accidental nicks that can weaken the fiber.Diagonal Cutter
Provides clean cuts on fiber optic cable and strength members. Clean cuts help maintain signal integrity and reduce the risk of microbending.Fusion Splicer
Aligns and fuses fiber ends with an electric arc. This equipment ensures low-loss, high-strength splices that withstand outdoor stresses.Visual Fault Locator (VFL)
Emits a visible laser to detect breaks or sharp bends in the fiber optic cable. Use this tool for quick field troubleshooting.Fiber Optic Power Meter with Light Source
Measures optical power and verifies network performance. This device helps you test the fiber optic connection after installation.Cable Pullers and Plows
Used for direct burial and conduit installations. These machines handle heavy-duty outdoor deployment, especially in rocky or frozen ground.Bucket Trucks and Aerial Lifts
Required for aerial installation on utility poles. Always check wind speed and cable weight before lifting.Cleaning Kits
Include lint-free wipes, isopropyl alcohol, and compressed air. Clean connectors and splices to prevent signal loss.Personal Protective Equipment (PPE)
Safety glasses, gloves, flame-resistant clothing, and hearing protection are mandatory. Use insulated gloves when cutting fiber optic cable.
Examples and Details | |
|---|---|
Hand Tools | Fiber optic strippers, buffer tube slitters, diagonal cutters, cleavers |
Consumables | Epoxy, adhesives, cleaning kits, lint-free wipes, isopropyl alcohol |
Termination Equipment | Fusion splicers, splice-on connectors, curing ovens |
Splicing Consumables | Mechanical splices, splice protectors, splice trays and closures |
Large Installation Equipment | Bucket trucks, trenchers, cable pullers, plows |
Testing Tools | Fiber optic power meters, visual fault locators (VFL), OTDRs |
Tip: Always inspect your necessary tools and equipment before starting work. Damaged or dirty tools can cause fiber breaks or poor splices, especially in harsh outdoor environments.
Splicing and Termination
Splicing and termination are critical steps in outdoor fiber optic cable installation. You must ensure every connection is strong, weatherproof, and low-loss to handle dynamic stress and environmental challenges.
Best Practices for Splicing and Termination:
Clean Fiber Ends Thoroughly
Remove dust, dirt, and oil before splicing. Contaminants can degrade splice quality and cause signal loss.Use Fusion Splicing Machines
Align fiber ends precisely and fuse them with an electric arc. Fusion splicing creates a permanent, low-loss joint that resists temperature swings and vibration.Test Every Splice
Use an OTDR or power meter to verify that splice loss is within acceptable limits. Document each result for future maintenance.Select High-Quality Connectors
Choose connectors compatible with your fiber optic cable type. Outdoor-rated connectors with weatherproof boots and seals prevent moisture ingress.Polish Connector Ends
Proper polishing reduces insertion loss and signal degradation. Use polishing films and inspect with a microscope.Protect Splices and Terminations
Place all splices in sealed trays or closures. Use gel-filled or water-blocking closures in flood-prone or humid areas.Route Cables Carefully
Avoid sharp bends and physical stress. Maintain the minimum bend radius specified by the manufacturer.Handle Cables with Care
During installation, avoid kinks, crushing, or excessive pulling force. Use pulling grips and monitor tension, especially in frozen or rocky soils.
Callout:
In permafrost regions, increase burial depth by at least 30 centimeters below the frost line. Use armored, gel-filled fiber optic cable to prevent freeze-thaw damage.
Testing and Troubleshooting
Testing is not just a final step—it is a continuous process throughout outdoor fiber optic cable installation. You must test the fiber optic connection at every stage to catch problems early and ensure long-term reliability.
Testing Procedures:
Inspect Fiber Connector End Faces
Use a portable microscope to check for dust, dirt, or scratches. Clean connectors with lint-free wipes and isopropyl alcohol.Verify Polarity and Continuity
Use a Visual Fault Locator (VFL) or OTDR to confirm correct fiber orientation and detect breaks or severe bends.Measure Insertion Loss
Use a light source and power meter or OLTS to measure total link loss. Compare results to your loss budget.Perform OTDR Testing
OTDRs help you locate splices, connectors, and faults along long outdoor runs. Adjust pulse width for the best balance of range and resolution.Document Test Results
Record all measurements, including loss, reflectance, and event locations. Good documentation speeds up future troubleshooting.Troubleshoot Faults
If you find high loss or no signal, use a VFL or OTDR to pinpoint the problem. Check transmitter LEDs or lasers first if the receiver shows no power.Loopback Tests
Use loopback tests on network equipment to isolate transmitter or receiver faults.Mark Buried Cables
Use marker tapes and surface markers to prevent accidental damage during future excavation.
Note:
Always test fiber optic cable on the reel for continuity before installation. This step helps you detect shipping damage before you deploy the cable in the field.
Safety and Environmental Protection
Outdoor fiber optic cable installation exposes you to unique hazards. You must follow strict precautions for safety and environmental protection to prevent injuries and protect your investment.
Precautions for Safety:
Wear safety glasses to shield your eyes from glass shards and laser exposure.
Use gloves (nitrile or latex) to prevent skin contact with broken fibers and chemicals.
Never look directly into fiber ends. Invisible laser light can cause permanent eye damage.
Maintain a clean, organized workspace. Dispose of fiber scraps in dedicated containers.
Use masks or ensure proper ventilation when working with chemicals like isopropyl alcohol or epoxy.
Never work on live electrical circuits without approval.
Secure cables using trays, conduit, or innerducts. Prefer velcro ties to avoid over-compression.
Label every endpoint and splice box for easy identification.
Protect exposed fiber optic cable with flexible conduit.
Follow manufacturer guidelines for cable handling and installation.
Description of Risk | Mitigation Strategies | |
|---|---|---|
Eye Safety | Infrared laser light and fiber scraps can cause serious eye injury. | Always wear safety glasses; never look into fiber ends; use power meters; handle scraps carefully. |
Fiber Scrap Injuries | Small fiber scraps can penetrate skin or be ingested. | Use dedicated containers for scraps; avoid dropping scraps; do not eat or drink near work areas. |
Chemical Safety | Cleaning agents and adhesives can cause allergic reactions or respiratory issues. | Work in ventilated areas; follow MSDS guidelines; avoid skin contact; stop use if allergic reactions occur. |
Fire Safety | Fusion splicing uses electric arcs that can ignite flammable gases. | Do not splice in confined spaces; use ventilated trailers; follow fire safety protocols. |
Tiny glass shards can embed in skin or be inhaled. | Wear gloves; dispose of scraps immediately; work in well-lit areas; use adhesive tape or specialized containers. |
Environmental Protection Measures:
Maximize the tensile rating of your fiber optic cable to withstand installation tension and environmental stresses.
Use robust protection methods such as secure routing, anchoring, and strain relief.
Manage splicing with protective enclosures and precise alignment.
Avoid sharp bends and use durable conduits to reduce breakage risks.
Select ruggedized fiber optic cable designed for industrial or military-grade durability.
Choose cables with moisture-resistant barriers for humid or coastal environments.
Use corrosion-resistant fiber optics in chemically harsh or corrosive settings.
Evaluate cable jacket ratings for resistance to moisture, UV radiation, and mechanical stress.
Use conduits and ducts to shield cables from mechanical damage, moisture, and sunlight.
Employ armored fiber optic cable in areas vulnerable to rodents or crushing forces.
Follow proper burial practices, including correct depth, protective conduit, and warning tapes.
For aerial installations, use cables designed to withstand wind, ice, and UV exposure. Ensure proper tensioning and install vibration dampers.
Apply weatherproofing techniques such as water-blocking tapes, gel-filled cables, and sealed enclosures.
Conduct regular maintenance and inspections to detect and fix potential damage early.
Implement rodent and pest protection measures like repellents or physical barriers.
Disaster Scenario:
After a flood, inspect all buried fiber optic cable for exposure or washout. Use distributed fiber optic sensors to detect abnormal vibration or strain. If you find a break, deploy a portable fusion splicer in a weatherproof tent. Test the fiber optic connection with an OTDR before restoring service.
Climate-Specific Solutions:
Permafrost Zones:
Increase burial depth by 30 cm below the frost line. Use armored, gel-filled cable to prevent freeze-thaw damage. Monitor ground movement with distributed sensors.Salt Spray Coasts:
Select fiber optic cable with PVDF or PE jackets rated for high chloride resistance. Use corrosion-proof conduits and seal all entry points.Floodplains and Swamps:
Use microducts with water-blocking technology. Elevate splicing enclosures above the highest known flood level.Hurricane Regions:
Install distributed vibration dampers and strain-relief hardware on aerial spans. Monitor wind speed and cable tension during storms.Desert and High-UV Areas:
Use UV-resistant jackets and bury cable below the surface to avoid temperature extremes.Mountainous Terrain:
Anchor fiber optic cable securely on slopes. Use armored cable to resist rockfall and landslides.
Smart Monitoring for 2025:
Install distributed fiber optic sensors (DAS) every kilometer. Set vibration and strain thresholds to trigger alerts before failures occur. Integrate sensor data with weather stations for predictive maintenance and insurance documentation.
Final Checklist for Outdoor Fiber Optic Cable Installation:
Inspect all necessary tools and equipment before use.
Wear full PPE and follow all safety protocols.
Test the fiber optic connection at every stage.
Document every splice, test result, and cable route.
Adapt your installation methodology to local environmental challenges.
Plan for future maintenance and restoration.
By following these steps and precautions, you ensure your outdoor fiber optic cable installation will withstand extreme weather, soil corrosion, and dynamic stress. You protect both your team and your investment, creating a network that is reliable, scalable, and ready for the future.
Fiber Internet Installation Costs and Tips
Cost Factors
Extreme weather, shifting soils, and dynamic stress make outdoor fiber internet installation more complex and costly than indoor projects. You must consider many factors before you start. The table below shows the main cost drivers for fiber internet installation in 2025:
Cost Factor | Description | Cost Range / Impact Details |
|---|---|---|
Labor Costs | Skilled professionals required; varies by region and expertise | $50 to $150 per hour or $1 to $7 per linear foot |
Permit Fees | Required for exterior/underground work; varies by municipality | $50 to $500 |
Installation Type | Aerial vs underground; underground more expensive due to excavation and materials | Higher cost for underground installations |
Project Complexity | Obstacles like existing infrastructure, multiple stories, or many connection points | Increases labor and time costs |
Accessibility | Hard-to-reach areas (crawl spaces, attics) require more labor | Adds to labor costs |
Site Preparation | Excavation, removal of old cabling, material delivery | Additional budget needed |
Post-construction Cleanup | Restoring landscaping or patching walls after installation | Additional cost |
Design/Engineering Fees | Custom layouts for unique or large properties | Professional fees apply |
Inspection Costs | Code compliance and quality assurance inspections | May be billed separately |
Additional Features | Upgrades like higher-capacity cables, extra outlets, smart home integration | Increase overall cost |
Maintenance, Warranties, Insurance | Ongoing considerations adding to total investment | Contribute to long-term costs |
DIY Installation | Can reduce labor costs but risks improper installation and code violations | Potential hidden costs or risks |
Aerial fiber optic internet installation usually costs between $40,000 and $60,000 per mile. Underground installation ranges from $5,000 to $20,000 per mile, depending on trenching, boring, and terrain. Urban areas often cost more due to permits and obstacles. You need to plan for these costs when making fiber internet available in your area.
Efficiency and Future-Proofing
You want your fiber internet installation to last and support fast speeds for seamless connectivity. To achieve this, use smart strategies that boost efficiency and prepare your network for future needs:
Design your fiber optic internet routes with redundancy. Separate main and backup paths to improve reliability.
Use loopback protection so your fiber internet connection can reroute traffic during failures.
Choose modular and scalable designs. This lets you upgrade easily as technology changes.
Handle cables carefully and use high-quality connectors to avoid damage.
Label every cable and keep detailed records for easy troubleshooting.
Test your installation thoroughly to meet industry standards.
Install conduits or flex tubing during construction. This makes future upgrades simple and avoids wall damage.
Centralize network equipment in an accessible area for easier management.
Use outdoor-rated access points to extend high-speed internet to patios and gardens.
Plan for new technologies like Wi-Fi 7 by choosing compatible infrastructure.
Tip: Install the fastest fiber optic infrastructure you can during new construction. This avoids expensive retrofits and keeps your fiber to the home ready for tomorrow’s demands.
Maintenance and Restoration
Outdoor fiber internet installation faces more risks from storms, floods, and wildlife. You must maintain your network to keep it reliable. Regular inspections and performance monitoring help you spot problems before they cause outages. Use the following steps for effective maintenance and restoration:
Inspect fiber optic cables and connectors for damage or contamination.
Clean connectors and test signal strength with optical loss test sets.
Keep detailed maintenance and repair records.
Train your team to handle restoration, including safety with PPE and electrical hazards.
Prepare emergency plans for disasters. Use drones to scan for breaks and deploy portable splicers for quick repairs.
Update your restoration plans as technology and network conditions change.
Note: How reliable is fiber internet? With proactive maintenance and smart restoration, you can keep your outdoor fiber internet installation running even after extreme events.
Smart monitoring systems, like distributed fiber optic sensors, can alert you to vibration or strain before failures occur. These tools help you protect your investment and deliver high-speed internet to every user.
Outdoor fiber installation in 2025 demands careful planning and strong attention to environmental challenges like extreme weather and soil corrosion.
Clear the route and label cables for easy maintenance.
Use advanced splicing tools and test every connection.
Protect cables by following bend radius limits and using proper conduits.
Choose the right fiber type for your distance and speed needs.
Always wear safety gear and stay updated on new technology.
Following FOA/OSP standards helps you build reliable, scalable networks that stand up to harsh outdoor conditions and future demands.
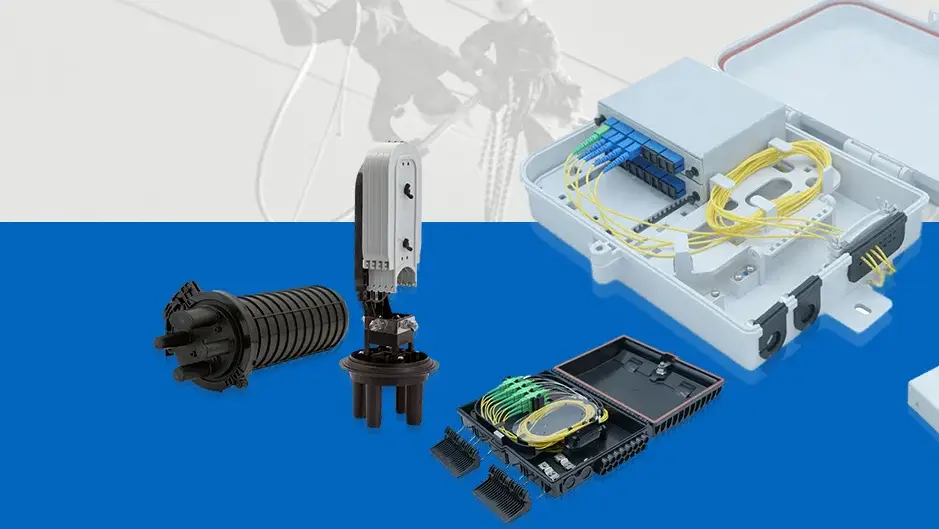
 Fiber Optic Termination Boxes
 Fiber Optic Splice Enclosures
 Fiber Patch Panels
 PLC Splitters
 Fiber Optic Pigtails
 OTDR Launch Cables
 Fiber Optic Adapters
 Fiber Optic Patch Cords